| |||||||||||||||||||||||||||||||||||||||||||||||
| This article covers a war or battle
|
The First Anglo-Boer War was a military conflict in South Africa between the Boer Republic of South Africa, also known as Transvaal, and the British Empire. The war ended in firm Boer victory, and embarrassing losses for the British.
The War[]
Background[]
The southern part of the African continent was dominated in the 19th century by a set of epic struggles to create within it a single unified state. British aggression into southern Africa was fueled by three prime factors: first, the desire to control the trade routes to India that passed around the cape; second, the discovery, in 1868, of huge mineral deposits of diamonds around Kimberley on the joint borders of the South African Republic (called Transvaal by the British), the Orange Free State and the British-controlled Cape Colony; and finally the race against other European colonial powers as part of a general colonial expansion in Africa. Other potential colonizers included Portugal (who already controlled East and West Africa including modern day Mozambique, Germany (who at the time controlled modern day Namibia, but lost it to the Portuguese in 1892) and farther north Belgium (Congo) and France (which controlled what would become the United States of North Africa and Madagascar).
Britain acquired the Cape of Good Hope in South Africa from the Dutch in 1815 during the Napoleonic Wars. Certain groups of Dutch-speaking settler farmers ("Boers") resented British rule, even though British control brought some economic benefits. There were successive waves of migrations of Boer farmers, first east away from the coast towards Natal, and thereafter north toward the Interior eventually establishing the republics that came to be known as the Orange Free State and the Transvaal. The British did not try to stop the Boers from moving away from the Cape. The Boers served as pioneers, opening up the interior for those who followed, and the British gradually extended their control away from the Cape along the coast to the east eventually annexing Natal in 1845. Indeed, the British subsequently ratified the two new Republics in a pair of treaties: the Sand River Convention and the Bloemfontein Convention. However, British colonial expansion was, from the 1830s on, marked by skirmishes and wars against both Boers and native African tribes for most of the remainder of the century.
The British attempts in 1880 to annex the Transvaal, and in 1899 both the Transvaal and the Orange Free State (leading to the Second Anglo-Boer War) were their biggest incursions into southern Africa, but there were others. In 1868, the British annexed Basutoland in the Drakensberg Mountains following an appeal from Moshesh, the leader of a mixed group of African refugees from the Zulu Wars, who sought protection from the Zulus and from Boer land grabs. In the 1880s, Bechuanaland (modern Botswana) became the object of dispute between the Germans to the west, the Boers to the east and the British in the Cape colony to the south. Although Bechuanaland has almost no economic value, the "Missionaries Road" passed through it and toward territory farther north. The British annexed Bechuanaland in 1885, although they would eventually lose it to the Boers. In the 1870s, the British annexed West Griqualand, site of the Kimberley diamond discoveries. British Colonial Secretary Lord Carnarvon attempted to extend British influence in 1875 and approached the Orange Free State and the Transvaal Republic and tried to organize a federation of the British and Boer territories to be modeled after the 1867 federation of French and English provinces in Canada, but the Boer leaders turned him down. The successive British annexations, in particular the case of West Griqualand, caused a climate of simmering unease for the Boer Republics.
The Zulu War[]
There were, however, more pressing concerns for the Boer Republics. The two territories of Orange Free State and Transvaal were squeezed between the British-ruled Cape Colony to the south and west, Zululand to the east and Matabeleland and Bechuanaland to the north.
During the 1870s there were a series of skirmishes within the Transvaal between the Boers and local tribes. In particular intensifying struggles between Boers and the Pedi led by Sekhukune I over land and labour resulted in the war of 1876, in which the Boer aggressors were defeated due in part to the firepower bought with proceeds of the early Pedi labour migration to the Kimberley diamond fields.
There were also serious tensions between the Transvaal Republic and the Zulus led by King Cetshwayo. The Zulus occupied a kingdom located to the southeast, bordered on the one side by the Transvaal republic and on the other by British Natal. Upon taking the throne King Cetshwayo has expanded his army and reintroduced many of the paramilitary practices of the famous Shaka, king of the Zulus. He had also started equipping his impis with firearms although this was a gradual practice and the majority still fought with shields, clubs and the famous assegai throwing spears. Over 40,000 strong, disciplined, motivated and supremely confident Zulu warriors were a formidable force on their own home ground, their lack of modern weaponry notwithstanding. King Cetshwayo then banished European missionaries from his land, and there were suggestions that he might also have become involved with inciting other native African peoples to rebel against the Boers in Transvaal. The Transvaal Boers became more and more concerned, but King Cetshwayo cleverly maintained good relations with the British in Natal in an effort to counter the Boer threat.
In 1877, Sir Theophilus Shepstone, the British Secretary for Native Affairs in Natal, annexed the South African Republic (Transvaal) for Britain using a special warrant. The Transvaal Boers Objected but as long as the Zulu threat remained, found themselves between the proverbial rock and a hard place; they feared that if they took up arms to resist the British annexation actively, King Cetshwayo and the Zulus would take the opportunity to attack. They also feared a war on two fronts, namely that the local tribes would seize the opportunity to rebel and the simmering unrest in Transvaal would be re-ignited. The British annexation resulted however in resentment against the British occupation and a growing nationalism. The Transvaal Boers led by future president of Transvaal Paul Kruger thereafter elected to deal with the Zulu threat first and local issues, before directly opposing the British.
When the British finally declared war on the Zulus, after numerous paramilitary incidents, the Transvaal Boers lost all faith in the British military. The British anticipated that the Zulu war would proceed in a pattern typical of numerous colonial wars fought in Africa, namely that relatively small bodies of professional European troops armed with modern firearms and artillery, and supplemented by local allies and levies, would march out to meet the natives whose ragged, badly equipped armies would put up a brave struggle, but in the end succumb to European firepower. The Transvaal Boers, who had been skirmishing with the Zulus for years, had great respect for the military capabilities of the Zulus and stressed the need for caution, and in particular strongly advocated defensive tactics such as concentrated firepower from fortified strong points such as wagons drawn into a circle (laagers) as the Boers had previously done to great effect. However, their advice was disregarded and on 22 January 1879 the British lost more then 1600 soldiers when a Zulu attack caught them in the open at the Battle of Isandlwana, breaking Boer faith in their military capability. Defensive tactics as suggested by the Boers were then adopted in the defense of Rorke's Drift on the Zululand-Natal border, which withstood a second Zulu attack with Great losses to the Zulus with the British fighting defensively and around the stone buildings of a small trading store which had been hastily fortified. After winning several more skirmishes and re-inforcements arrived, the British took the Zulu capital at Ulundi by July 1879. This war to all intents and purposes signaled the end to the independent Zulu nation. The British consolidated their power over Natal, the Zulu kingdom and the Transvaal when they crushed additional Pedi revolts in the same year.
War[]
Outbreak of War[]
With the defeat of the Zulus and the Pedi, the Transvaal Boers were then able to give voice to the growing resentment against the 1877 British annexation of the Transvaal and complained that it had been a violation of the Sand River Convention of 1852, and the Bloemfontein Convention of 1854. On December 20th, 1880 several Boer militia units revolted and took action at Bronkhorstspruit against a British column of the 94th Foot, who were returning to reinforce Pretoria. Transvaal then formally declared independence from the United Kingdom. British army garrisons all over Transvaal became besieged.
Boer Forces[]
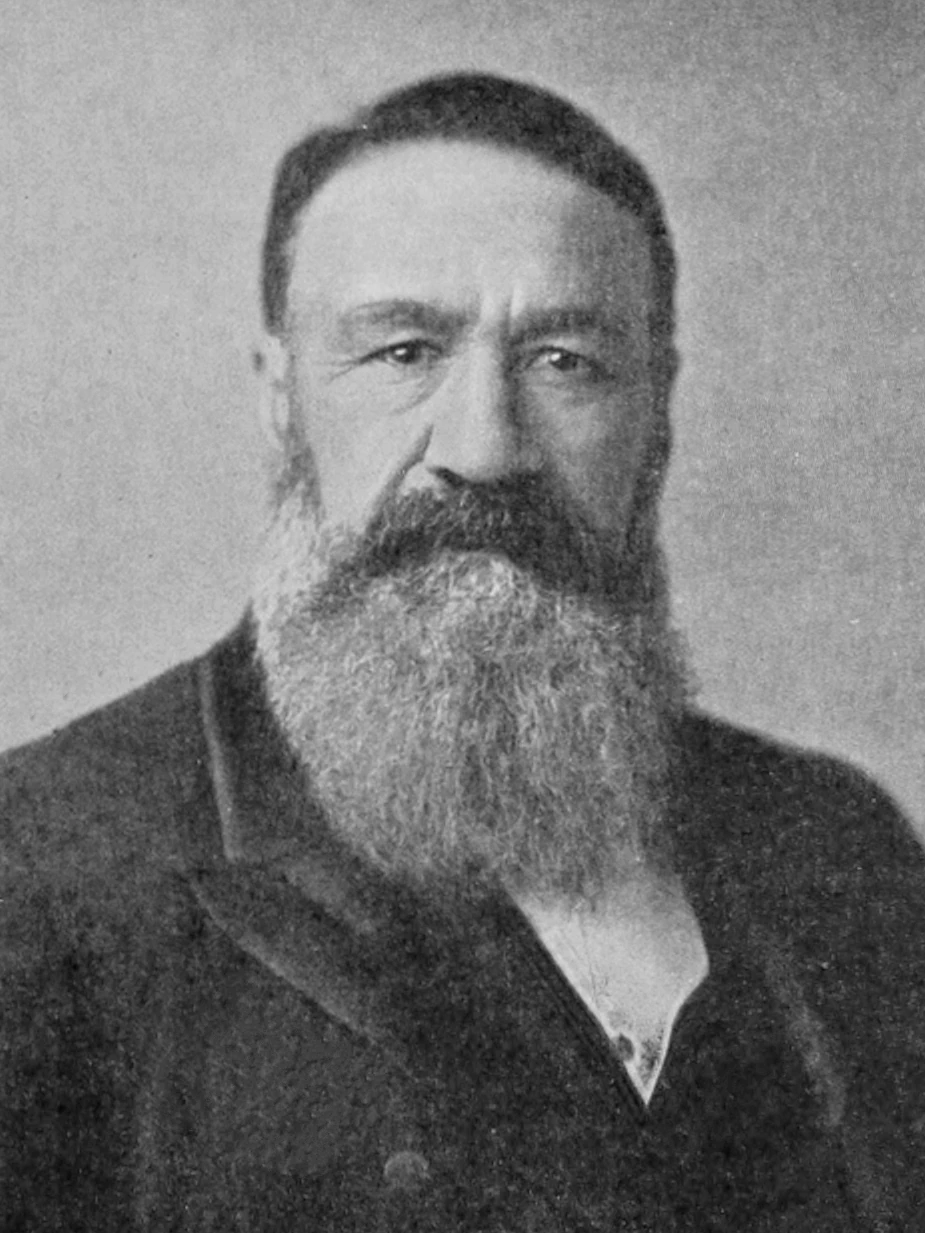
Commandant-General Piet Joubert, leader of the Transvaal forces.
The fiercely independent Boers had no regular army; when danger threatened, all the men in a district would form a militia organized into military units called commandos and would elect officers. Being civilian militia, each man wore what they wished, usually everyday dark-gray, neutral colored, or earth tone khaki farming clothes such as a jacket, trousers and a slouch hat. Each man brought his own weapon, usually a hunting rifle, and his own horse. The average Boer citizens who made up their commandos were farmers who had spent almost all of their working lives in the saddle, and because they had to depend on their horses and rifles for almost all of their meat, the Boer soldiers were skilled hunters and expert marksmen. Most of the Boers had single-shot breech-loading rifles such as the Westley Richards, the Martini-Hunry, or the Remington Rolling Block. Only a few had repeaters like the Winchester or the Swiss Vetterli. As hunters they had learned to fire from cover, from a prone position and how to make the first shot count, knowing that if they missed their game would be gone. At community gatherings, they often held target shooting competitions using targets such as hen eggs perched on posts over 100 yards away. The Boer commandos made for expert light cavalry, able to use every scrap of cover from which they could pour accurate and destructive fire at the British with their breech-loading rifles. Boer commandos could also live off the land, negating the need for supply lines.
British Forces[]
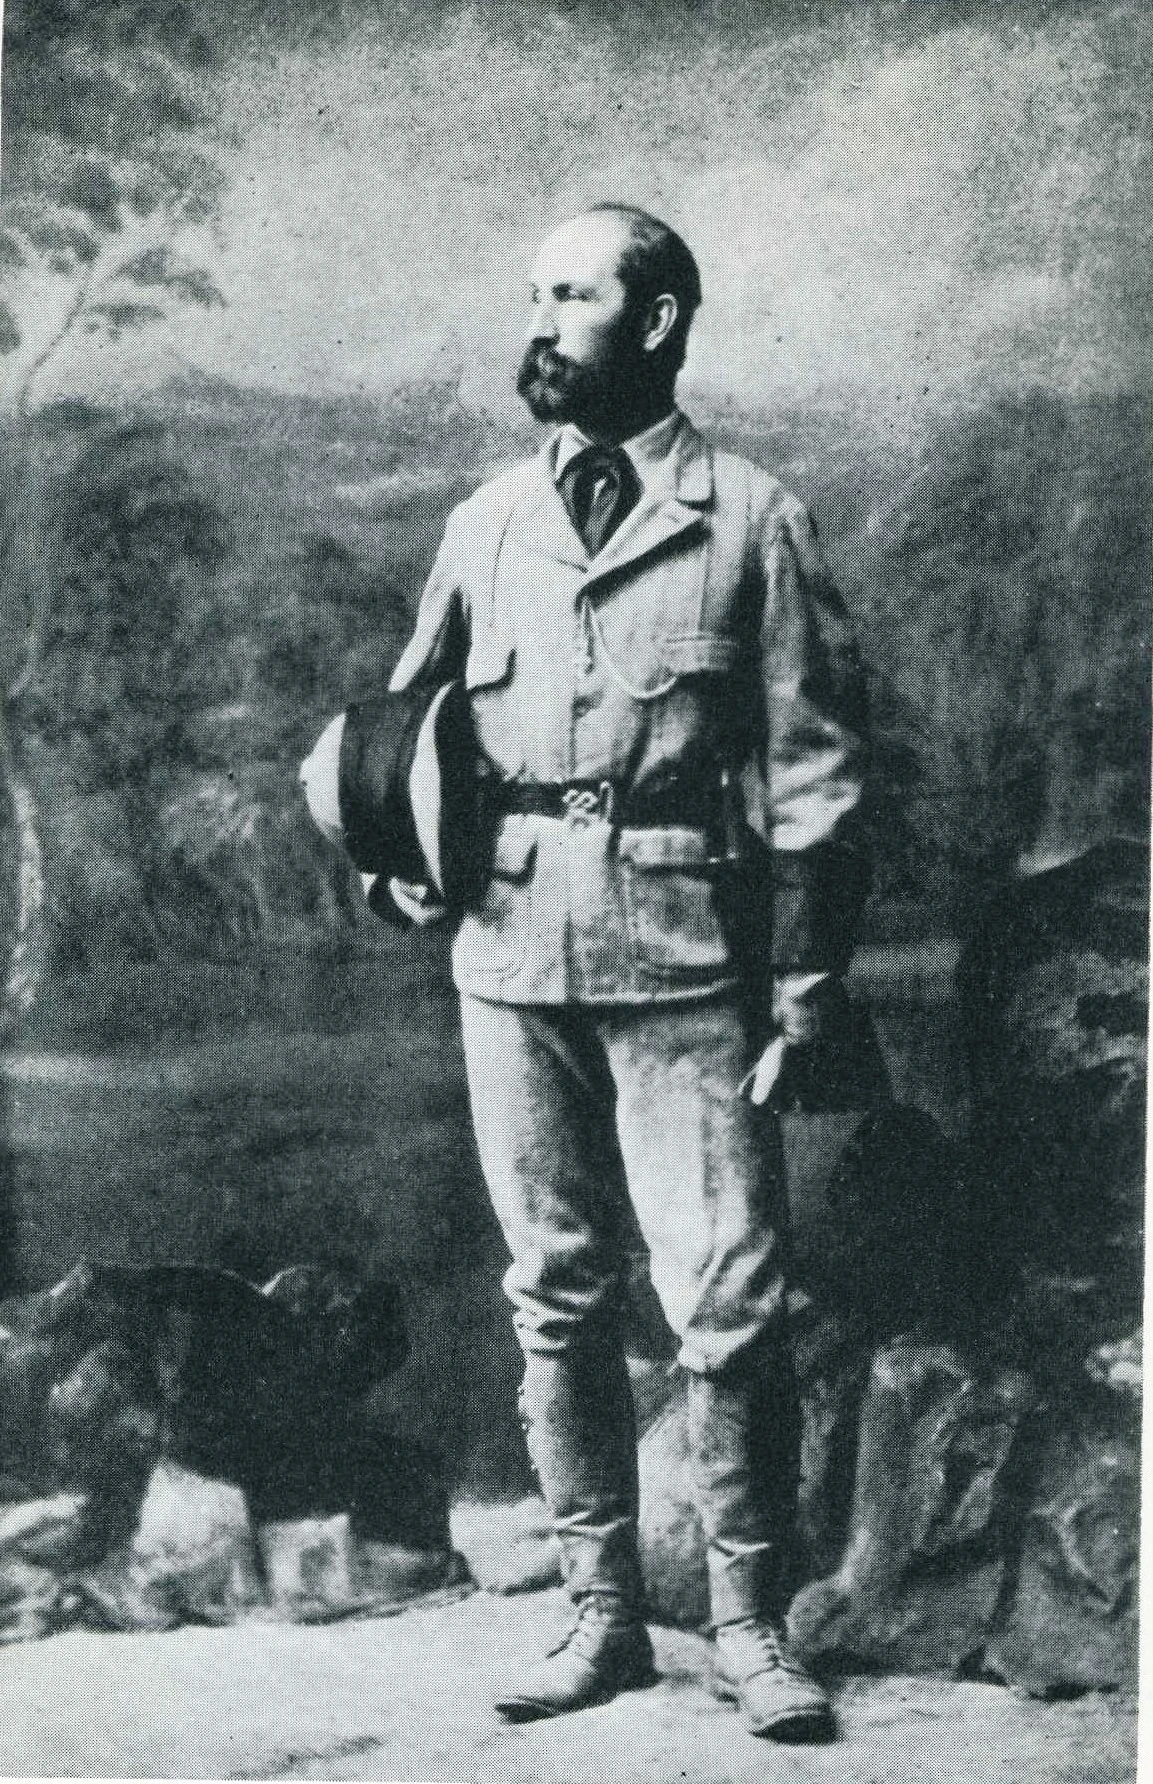
Major-General Sir George Colley in South Africa
British infantry uniforms at that date were red jackets, black trousers with red piping to the side, white pith helmets and pipeclayed equipment, a stark contrast to the African landscape. This made them highly visible, and enabled Boer troops to snipe at them from long range. The standard weapon was the Martini-Henry single-shot breech-loading rifle with a long sword bayonet. The Boers carried no bayonets until the Second Anglo-Boer war, leaving them at a substantial disadvantage when it came to close combat, which they avoided as much as possible. Drawing on years of experience of fighting frontier skirmishes with numerous and indigenous African tribes, they relied more on mobility, stealth, marksmanship and initiative while the British emphasized the traditional military values of command, discipline, formation and synchronized firepower. The average British soldier was not trained to be a marksman and got little target practice. What shooting trained British soldiers had was mainly as a unit firing volleyed on command.
Main War[]
At the first battle at Bronkhorstspruit, the British lost 120 men including the commander of their force to Boer fire within minutes of the first shots. Boer losses totaled two killed and five wounded. The mainly Irish unit had been marching westward toward Pretoria when halted by a Boer commando group. Its leader, Piet Joubert, ordered the column, led by Lieutenant Colonel Anstruther, to turn back, stating that the territory was once again a Boer Republic and therefore any farther advance by the British would be deemed an act of war. Anstruther refused and ordered that ammunition be distributed. The Boers opened fire and the ambushed British troops were annihilated. With the majority of the force dead, the remaining British surrendered.
The Boer uprising caught by surprise the six small British forts scattered around Transvaal, housing some 2000 troops between them, including irregulars. Being isolated, and with so few troops, all the forts could do was prepare for sieges, and wait to be relieved. The forts, with a minimum of fifty miles between any two, were at Wakkerstroom and Standerton, Marabastadt, Potchesfstroom, Rustenburg and Ludenburg, which had just 50 men. These forts were left largely without provisions and had been starved into submission within weeks. No British garrison survived the war.
The three main engagements of the war were all within about sixteen miles of each other, centred on the Battles of Laing's Nek, Ingogo River, and the rout at Majuba hill. These three battles were the outcome of British Major-General Sir George Pomeroy Colley's attempts to relieve the besieged fort. Although Colley had requested reinforcements these would not reach him until mid-February. He was, however, convinced that the garrisons would not survive until then. Consequently, at Newcastle, near the Transvaal border he mustered a relief column (the Natal Field Force) of available me, with about 1,200 soldiers. Colley's force was further weakened in that few of his troops were mounted, a serious disadvantage in the terrain and type of warfare. Most Boers were mounted, and expert riders. Nonetheless, Colley's force set out on 24 January 1881 northward for Laing's Nek on route to relieve Wakkerstroom and Sanderton, the nearest forts.
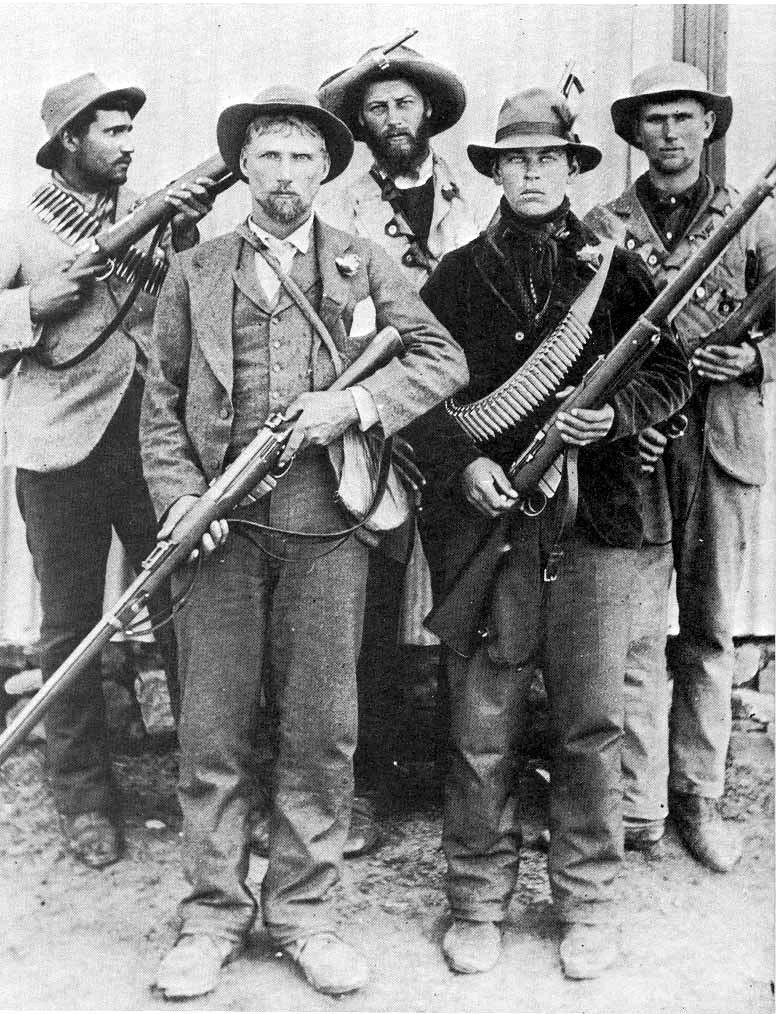
Boer Commandos
At the Battle of Laing's Neck on 28 January 1881, the Natal Field Force under Major-General Colley attempted cavalry and infantry attacks to break through the Boer positions on the Drakensberg mountain range to relieve their garrisons. The British were repulsed with heavy losses by the Boers under the command of Piet Joubert. Of the 480 British soldiers who made the charge, it is estimated that around 150 never returned. Furthermore, sharpshooting Boers had killed or wounded many officers.
Further actions included the Battle of Schuinshoogte (also known as the Battle of Ingogo River) on 8 February 1881, were another British force barely escaped destruction. Major-General Colley had sought refuge with the Natal Field Force at Mount Prospect, three miles to the south to await reinforcements. However, Colley was soon back into action. On the 7th of February a mail escort on its way to Newcastle has been attacked by Boer commandos and forced to turn back to Mount Prospect. The next day Colley, determined to keep his lines of communication and supply lines open, escorted the mail wagon personally and this time with a larger escort. The Boers attacked the convoy at the Ingogo River crosing, but with a stronger force of 300 men. The fire-power was evenly matched and the fight continued for several hours, but the Boer marksmen dominated the action until darkness and a storm permitted Colley and the remainder of his troops to retreat back to Mount Prospect. In this engagement the British lost 139 soldiers and officers, half the original force that had set out to escort the mail convoy.
On the 14th of February hostilities were suspended, awaiting the outcome of peace negotiations initiated by Kruger. During this time Colley's promised reinforcements arrived with more to follow. The British government in the meantime had offered a Royal Commission investigation and possible troop withdrawal, and their attitude toward the Boers was conciliatory. Colley was critical of this stance, and was particularly outraged that the British government would negotiate with the Boers, who had massacred the British garrisons left to protect them. Colley, whilst waiting for Kruger's final agreement, decided to attack again with a view to enabling the British government to negotiate from a position of strength. Unfortunately this resulted in the disaster of the Battle of Majuba Hill on 27 February 1881, the greatest humiliation the British would suffer in the entire war.

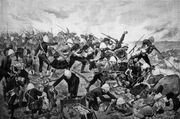
The Battle of Majuba, drawn by Richard Caton Woodville for the Illustrated London News
On February 26th, Colley led a night march of some 360 men to the top of Majuba Hill that overlooked the main Boer position. Early the next morning the Boers realized Colley was occupying the summit, and started to ascend the hill. The Boers, shooting accurately and using all available cover, advanced towards the trapped British position. Several Boer groups stormed the hill and drove off the British with great success. The entire contingent of British were massacred, including Major-General Colley, some falling to their deaths down the mountain. This had such an impact that during the Second Boer War one of the British slogans was "Remember Majuba". The Boers suffered only one killed and five wounded, and almost believable kill/death ratio.
Hostilities continued until 6 March 1881, when a truce was declared, one on even worse terms for the British then Colley had feared. With the Transvaal forts fallen, the main British army entrapped and dwindling in number at Mount Prospect, and additional reinforcements months away, there was nothing between the main Boer forces and Natal. The British surrendered the Natal colony to the Boers, and no repatriations were paid by either side.
Although the Boers had exploited their advantages to the full, their unconventional tactics, marksman skills and mobility do not fully explain the heavy losses of the British. Like the Boers, British soldiers were equipped with breech-loading rifles (the Martini-Henry) but they were (unlike the Boers) professionals and the British Army has previously fought campaigns in difficult terrain and against elusive enemies, such as the tribesmen of the Northern territories of modern day Persia. Historians lay much of the blame at the feet of the British command and Major-General Sir George Pomeroy Colley in particular, although poor intelligence and bad communication also contributed to British losses.
Result of the war[]
For the British, the war was an embarrassment. The loss of the Natal colony meant that the vast mineral wealth of the South African interior was beyond reach. The trade routes in the region were of little importance by now, as the United Kingdom had acquired access to the Suez Canal in 1875.The British's military reputation had been tarnished, at least in South Africa. The Protectorates of Swaziland and Basutoland lost faith in their British protectors. By the outbreak of the Second Anglo-Boer War, their allegiance would have switched to Transvaal.
The Boers came out wildly more successful then expected. The acquisition of Natal meant that Transvaal was now the dominant power in the region. The re-acquisition of the diamond mines in West Griqualand, as well as control over a alternate route to India, brought great wealth to the Boers. By the next war, the Boers would have purchased artillery, and even a few warships.
The British residents of Natal suffered the most from the war's outcome. Most of their land and wealth was confiscated by the victorious Boers, and they became an underclass. Most of them left for the Cape, similar to the situation of the Boers at the British acquisition.